|
Body Tube We finished our body tube on 11/19, Thursday. Andrew did a demonstration of making a body tube using thick paper and wood glue. He showed us that you can build a body tube by precisely twirling a piece of thick paper along a PVC pipe so that it aligns correctly. After twirling three layers of the thick paper, you supervise it so that there aren't any bubbles that show up at the creasing. Andrew is letting us use the one he made in the demo. I'm happy I learned how to make a body tube that's pretty much a paper towel role, it was interesting to learn. 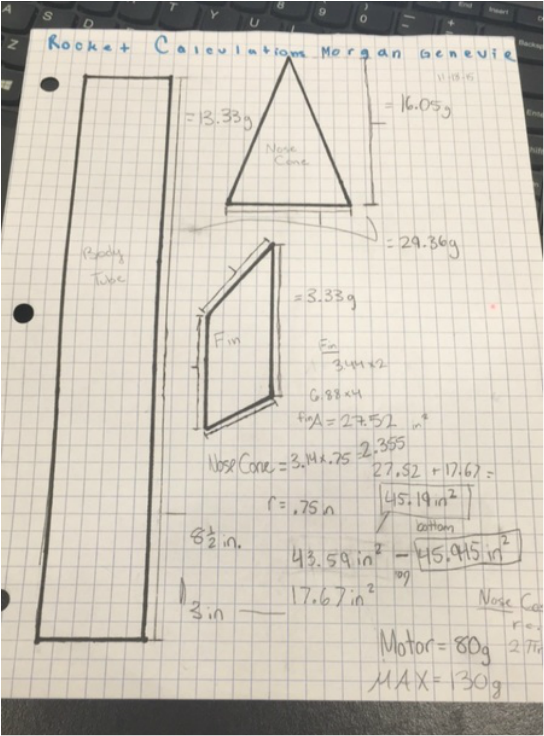 Prior to Building the Fins
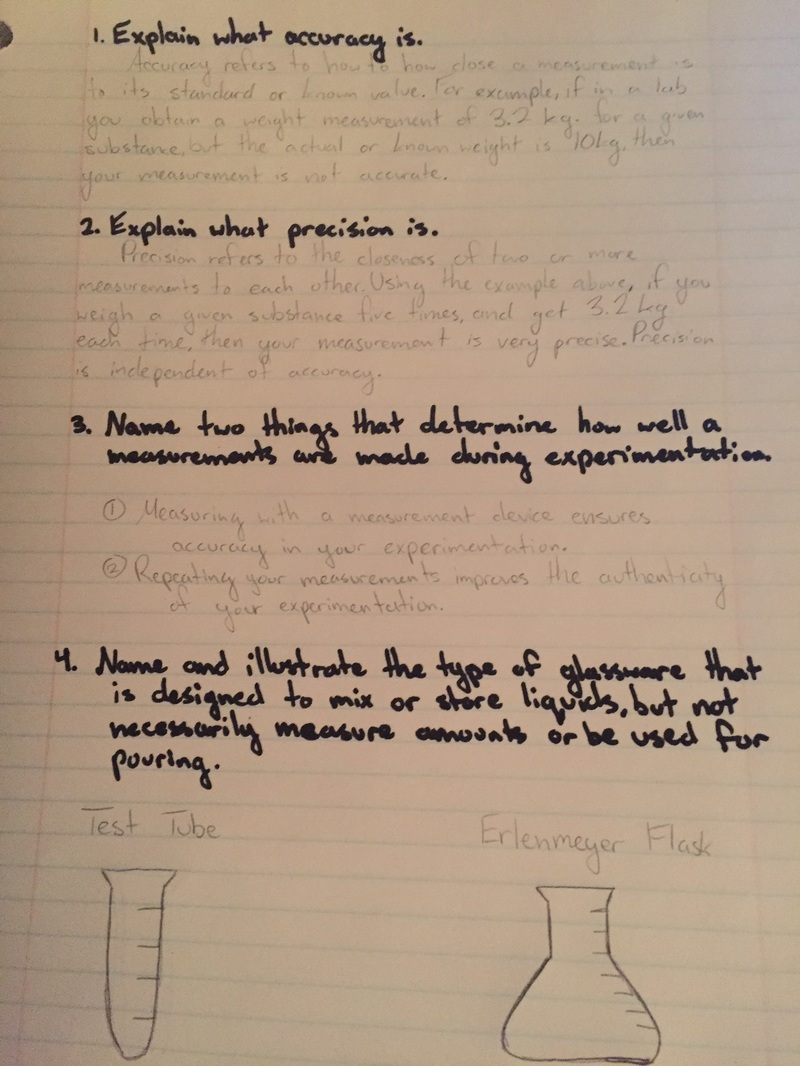
We had to find the center of mass and center of thrust, and from there calculate the surface area of the space above and below the center of thrust. Once we found the top half and bottom half, we had to make the fins a size with the surface area that would equal out the top and bottom parts of the rocket. Fins We started out with one clipped parallelogram shaped fin and used that to draw three more fins. The fin's material was thin balsa wood that we got from a box full of scraps of wood. I came up with the idea of tracing a circle of our body tube onto a piece of paper, and then drawing 4 equal lines on the paper. Then placing the body tube where I drew the circle and drawing lines on the tube using the lines on the paper to indicate where the fins should be glued. Before glueing the fins on, we weighed them and did the overall calculations for the rocket(which you can find at the top of this post). Morgan glued the fins on with super glue while I helped her make sure they were aligned correctly with each other. After we finished glueing, we were told to account only one surface area for each fin instead of double the surface area as we had done in our calculations. The calculations were perfect when we counted both sides of the fins because both the top and bottom halves of our rocket were equal to each other. Instead of changing the size of our four fins, we just made four more. Adding the 4 fins (so we had 8 in total) evened out the weight of both sides of the rocket. Nose Cone Before we began building, I thought that constructing the nose cone would be the hardest to do. But it turned out to be the easiest because Andrew showed us that if a PVC cap could fit perfectly into the body tube we built, then it can be used as a nose cone. The PVC cap became even more convenient when the amount of weight it had helped to even out our rocket. It was also helpful in the way that it could fit in our body tube with enough resistance to avoid slipping out during the launch and slip out enough so the parachute can be deployed properly. Parachute We used a clean trash bag as the main material for our parachute. Using a makeshift compass, we drew a circle on the trash bag. So that punching holes near the edges of the trash bag could be done easily, we equally wrapped four pieces of duct tape around the edges of the circle. Then we punched in four holes in the duct tape and tied fishing line into the holes. With the four strings of fishing line, we tied it around the shock cord, therefore when the nose cone slips out during launch, the parachute can be deployed. Engine Housing We don't need anything to actually house our motor because our body tube is sized so the motor can be slipped in with only a metal clip to help it from falling out. Our classmate, Jesus, helped us with the metal clip. I think he was misinformed though because he told us that the end of the metal clip that was bent inside the body tube had to be long enough so the motor wouldn't slide upwards or anything. So on launch day we were told that we shouldn't have the end of the metal clip be that long, and he clipped it with pliers. Body Tube We were confused about what kind of material we should use to make for the body. I thought that maybe a paper towel roll would work but Andrew said that one of those rolls actually weighs a lot. We decided to use a body tube using this kind of making process. Ultimately, he suggested that we make our own rolls, using a method of wrapping and glueing layers together. We both want the body tube to be somewhere around 15 inches long but it depends on the weight of the whole rocket. Fins We researched fin designs and I proposed we use a clipped parallelogram with a 4-fin placement. As seen below, the clipped parallelogram design in the first column in the second row and 4-fin placement in middle column, last row. 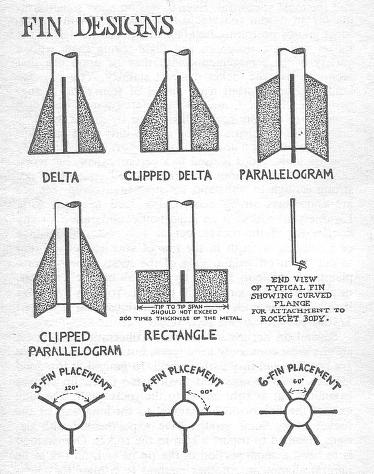 Nose Cone
Morgan and I are most likely going to use balsa wood for nose cone. We're not sure how we're going to make it, like what exactly the process is. I proposed that our nose cone be pointy rather than curved so we're making our nose cone pointy. Then for a shock cord, we're going to use another shock cord from an old rocket. Engine Housing We were told that our body tube would fit our motor so we wouldn't really need any engine housing other than a metal clip that would keep our engine in the rocket. Parachute I guess we're going to just use a trash bag and punch four holes in it then tie the parachute to the shock cord. Additional Components if we ultimately decide to do an engineering challenge, we would like to do the package deployment idea. If we do a package deployment, at some point the package will deploy and there will be a second parachute specifically for the package that will let it float down to the ground safely. Things We Need to Consider 5:1 thrust to mass ratio is the lowest we can go. 6 or 7 would be even better. The maximum that our rocket can weigh is 214.6 grams. Considering that the motor will weigh about 80 grams that give us about 130 grams for the rest of the rocket to weigh. We calculated our burnout time and average thrust after viewing the video of our motor test. Our final data for Gonovio Express can be seen below.
Burnout time in seconds (t): 0.84 Average Thrust in N (T): 11.87 The data for the motor that we're going to use our final rocket can be seen below. Burnout time in seconds (t): 8.43 Average Thrust in N (T): 1.25 A possible engineering challenge we might do with the Kim Jong Un was Here motor would be a package deployment. We want our final rocket to be relatively small and obviously aerodynamic. 11/16 Monday - Make plan for first 2 weeks, blog it
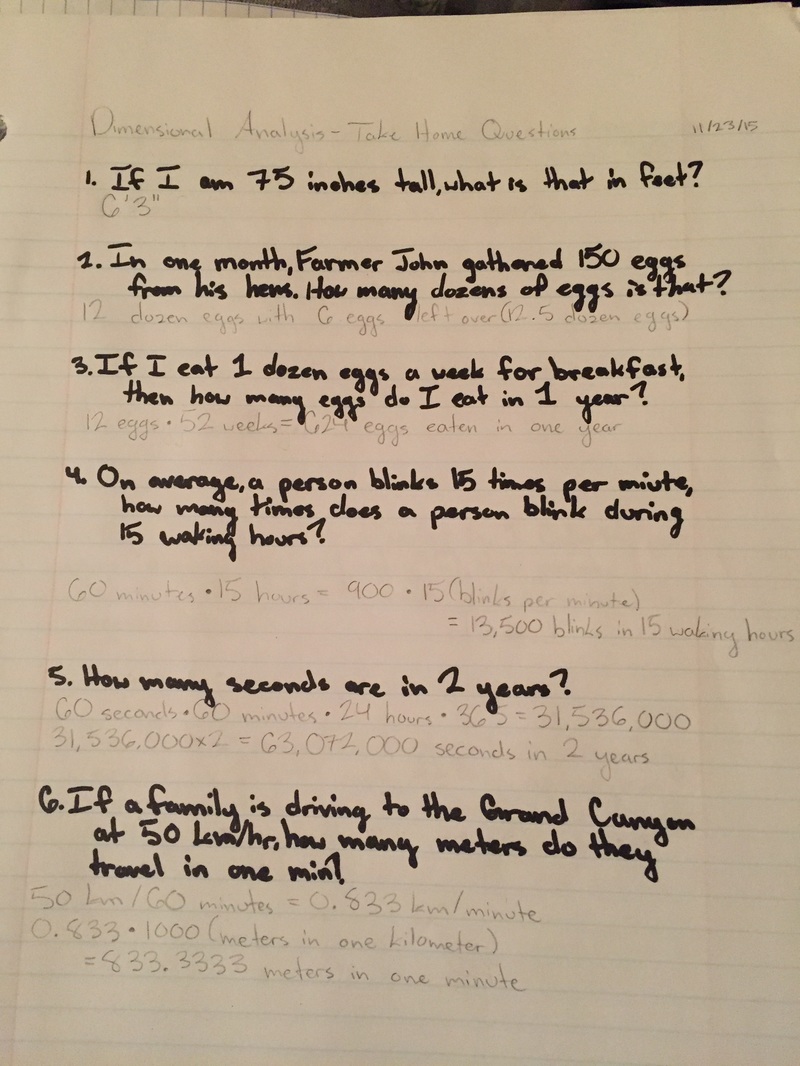
11/17 Tuesday - Start rocket calculations 11/8 Wednesday - Rocket calculations 11/9 Thursday - Start building rockets 11/10 Friday - Build rocket *THANKSGIVING BREAK* (I'm probably going to do a worksheet over break) 11/30 Monday - Build rocket 12/1 Tuesday - Build rocket 12/2 Wednesday - Build rocket 12/3 Thursday - Rocket/worksheet 12/4 Friday - Update blog Morgan and I were scrolling through the motor thrust curve files trying to find a thrust curve that we liked that didn't CATO. At first, we were just looking at the thrust curves but then we realized that we wanted to use black powder core burners instead of end burners with sugar or potassium nitrate. We came across Fehung, Alex W, Nancy, and Alex S's thrust curve, and we saw that they had a cored burner with black powder for their rocket. Also, their core was sized differently halfway like Morgan and I planned on having, but ours didn't work and theirs did. I was interested mostly in their rocket because their rocket had a 7/32" nozzle which ours didn't have, so they have the element that we were missing, that made our rocket CATO. Here's their thrust curve: This is the thrust curve and motor design document my partner Morgan and I put together a couple of days ago. it includes everything about our motor and what happened when we tested it (the thrust data was put into a line chart on google spreadsheet). Morgan and I chose to do this motor because we were interested in having the different sized half-cores. I personally would like to use this motor again for our final rocket but since we had too much thrust then I don't think we could use it again. Background Research Silicates:
How do you get from silicon to rocks?
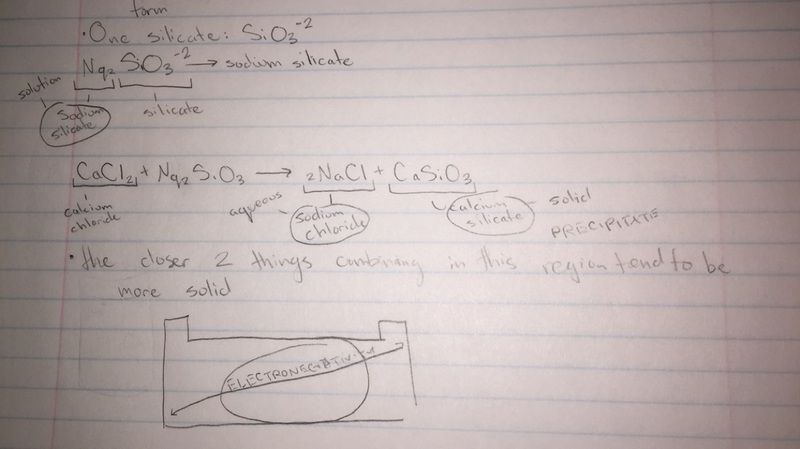 Lab 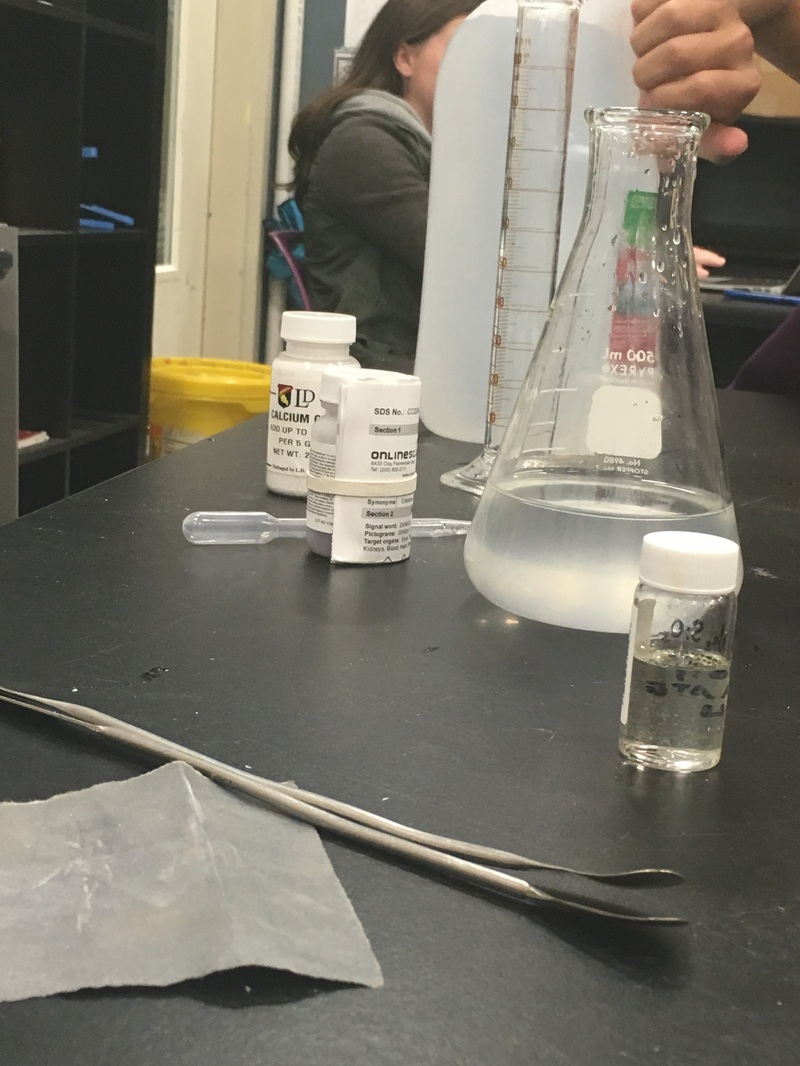 First, we poured the solution of 100 ml of sodium silicate and ionized water into test tubes. At the end of pouring, the solution of sodium silicate and water was in roughly a 2:3 ratio. 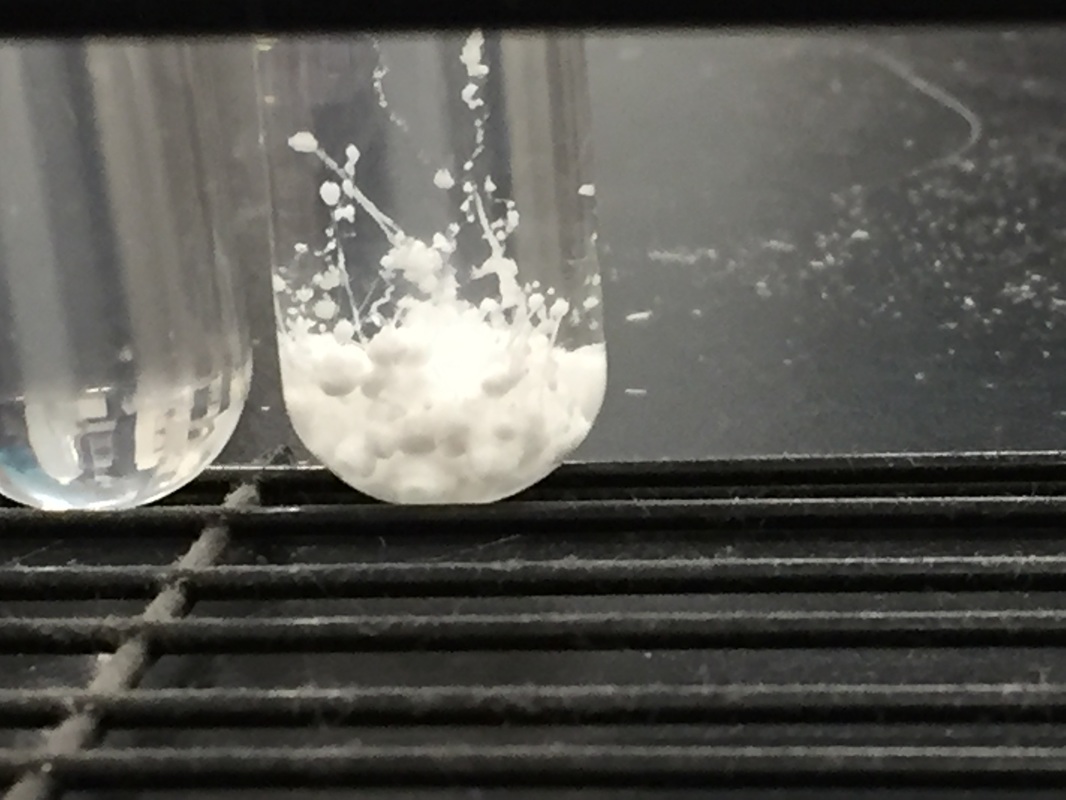 Then we poured calcium chloride into one test tube. We had to be careful not to touch it because calcium chloride is a mild base similar to lye so it could burn your skin. 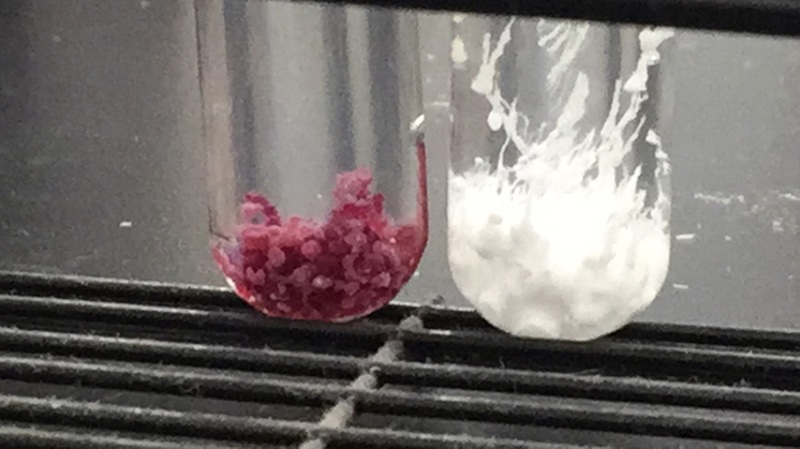 Next, we poured cobalt chloride into a test tube, it started out as this red-purple color but then it turned into purple, green, and blue (as you can see in the next two photos). 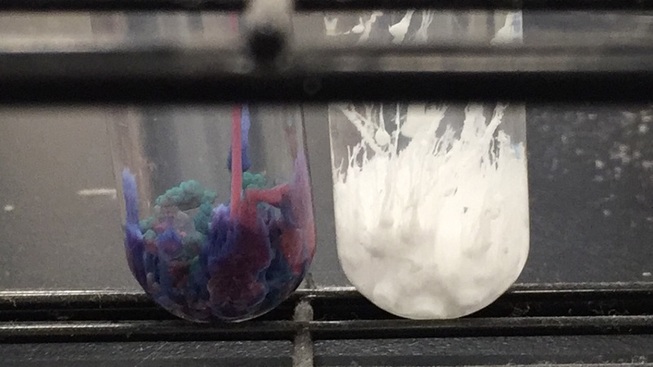 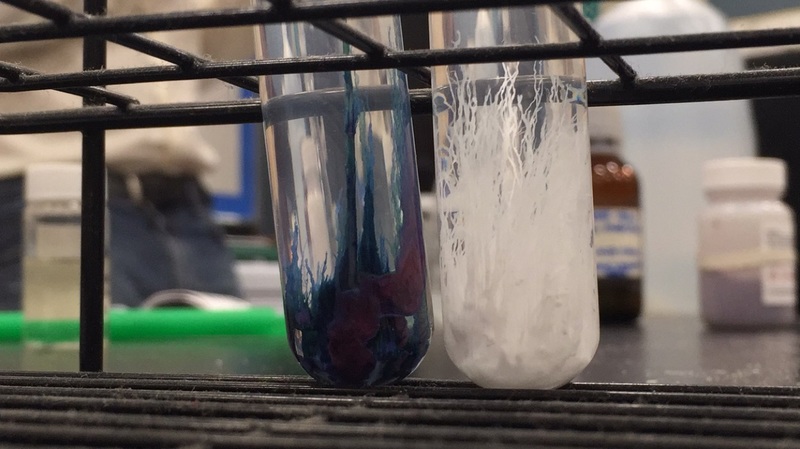 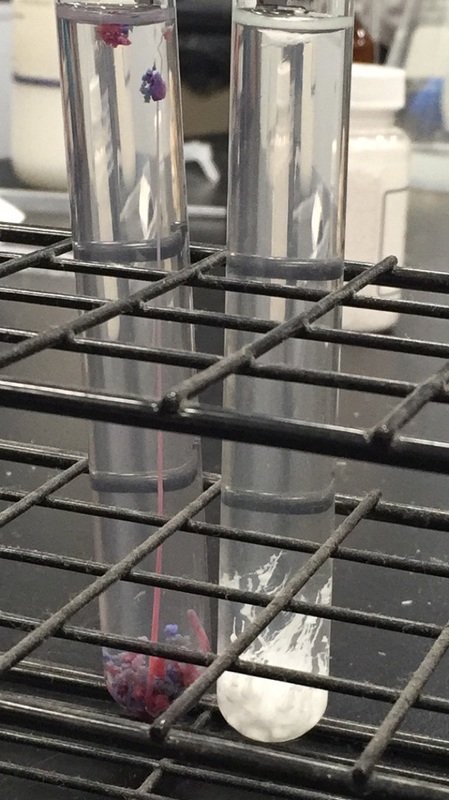 The little formations that took place at the bottom started releasing little strings of it to the surface of the water.
Andrew added copper solfate to another test tube, the color of the formation at the bottom was blue. The formations that took place in the copper solfate test tube didn't happen nearly as fast as in the first and second test tubes (calcium chloride and cobalt chloride). At first, it didn't work that well but after a couple of minutes the pointy, bubbly things started to form. I'm not sure what I predicted was going to happen. The lab was called "Making Rocks" and I guess my mind just assumed that the lab was going to have literal rocks in it . . . but it didn't so I guess my prediction didn't really work out. I guess the name is what made me the most interested in the lab because it sounds like an impossible thing to do, to make literal rocks. But I took the name a little too literally haha. Reflection When everyone started pouring the calcium chloride, etc. into the test tubes, my partner and I decided that we just wanted to watch. It was on a Tuesday morning and we just didn't like it haha. But I was asked if I wanted to pour it in the test tube and I ended up doing it. I wonder what the pouring thing I used is called, it was a neat little tool. I'm a little confused on some things. I'm proud of myself because I was able to achieve the goal I set for myself in the last lab, which was to pay less attention to my notes and be more in the moment of the lab. Like listen closely to the teacher when he's explaining a crucial aspect of the lab. In the last lab, the part I didn't listen that well to was the atomic structure explanation. But in this lab, I was able to ignore taking notes and just listen to my teachers's explanation of the periodic trend. I have a better understanding of it then if I was just taking notes during his explanation. Generally, I'm confused on how we actually made rocks? Near the end, my tecaher said that when you mix metals into the solution the reaction will take place and create a rock. Does that mean the neat little formation that materialized at the bottom of the test tube was the "rock"? Like, at what point during the lab was a rock made? I personally would be a little less confused if, during the recap at the end of the lab, the reaction that occurred could be further explained. Or the point at which rocks were produced is further explained. |
AuthorHey there! I'm currently in 10th grade at High Tech High in Point Loma, San Diego, California. This is my first year in Chemistry 1, and 2 and this is my class blog. You can learn more about who I am in my 'About Me' page. Archives
November 2015
Categories |

 RSS Feed
